Installation on local computer (Mac)
For example on High Sierra|
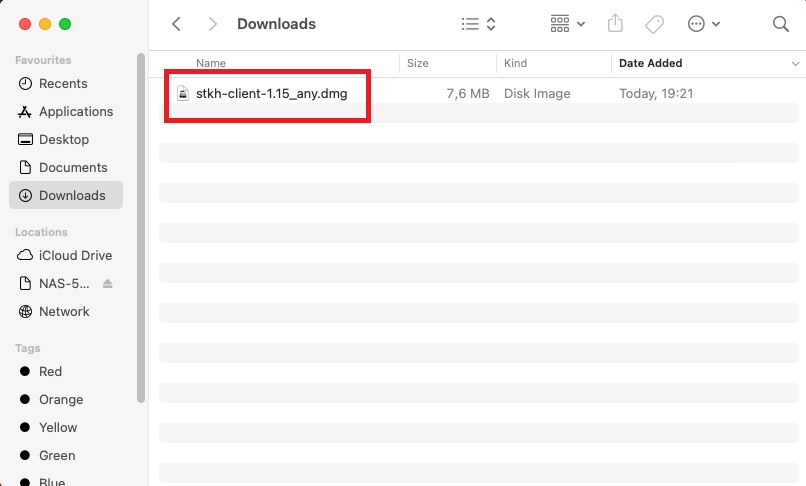
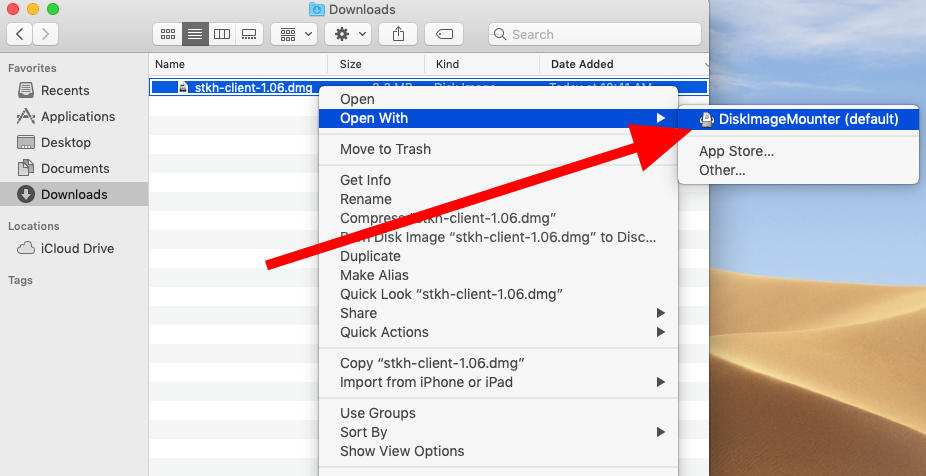
Installation package should be downloaded here.
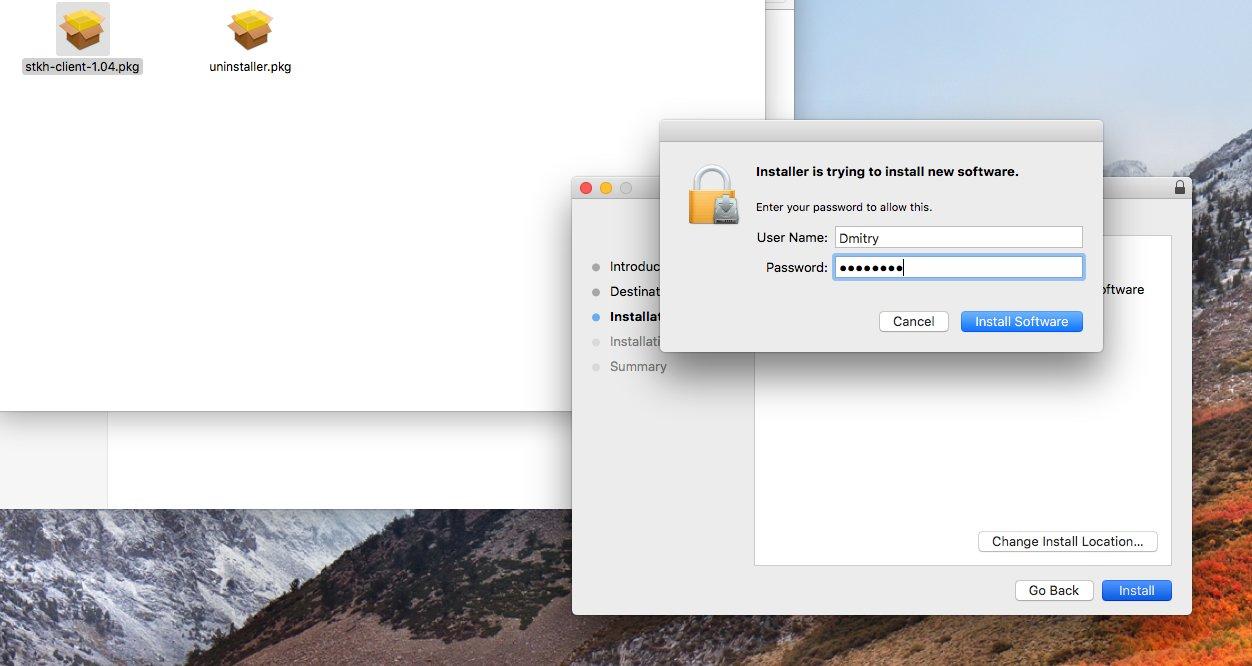
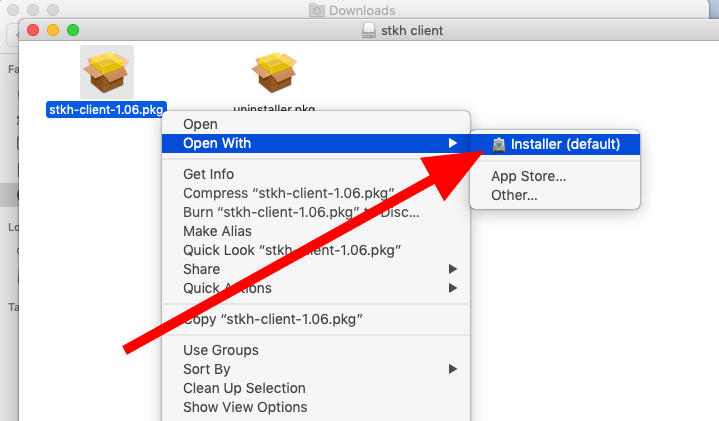
After click on .dmg-file the .pkg-package will be available for installation, which will open the standard package installation wizard.
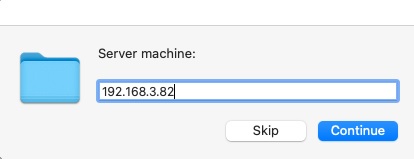
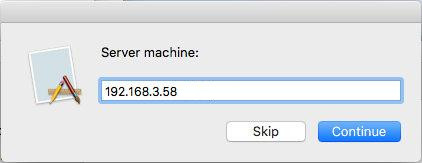
During installation, a window appears for entering the server machine:
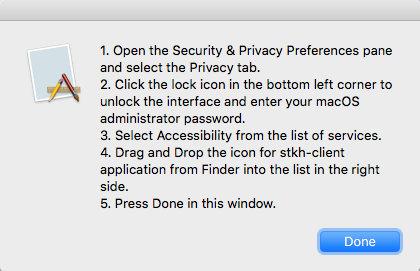
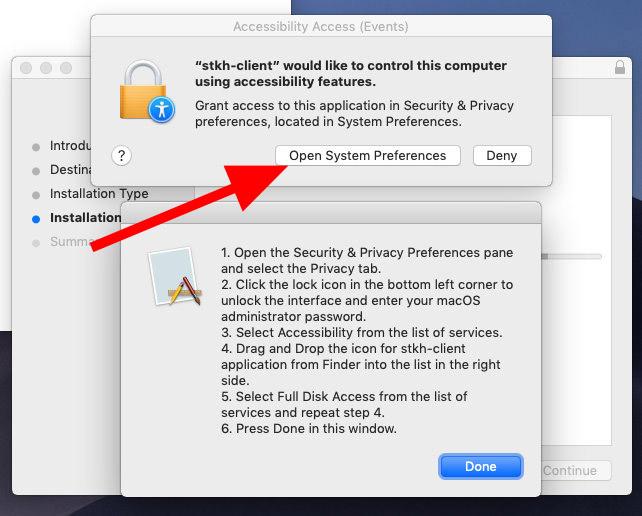
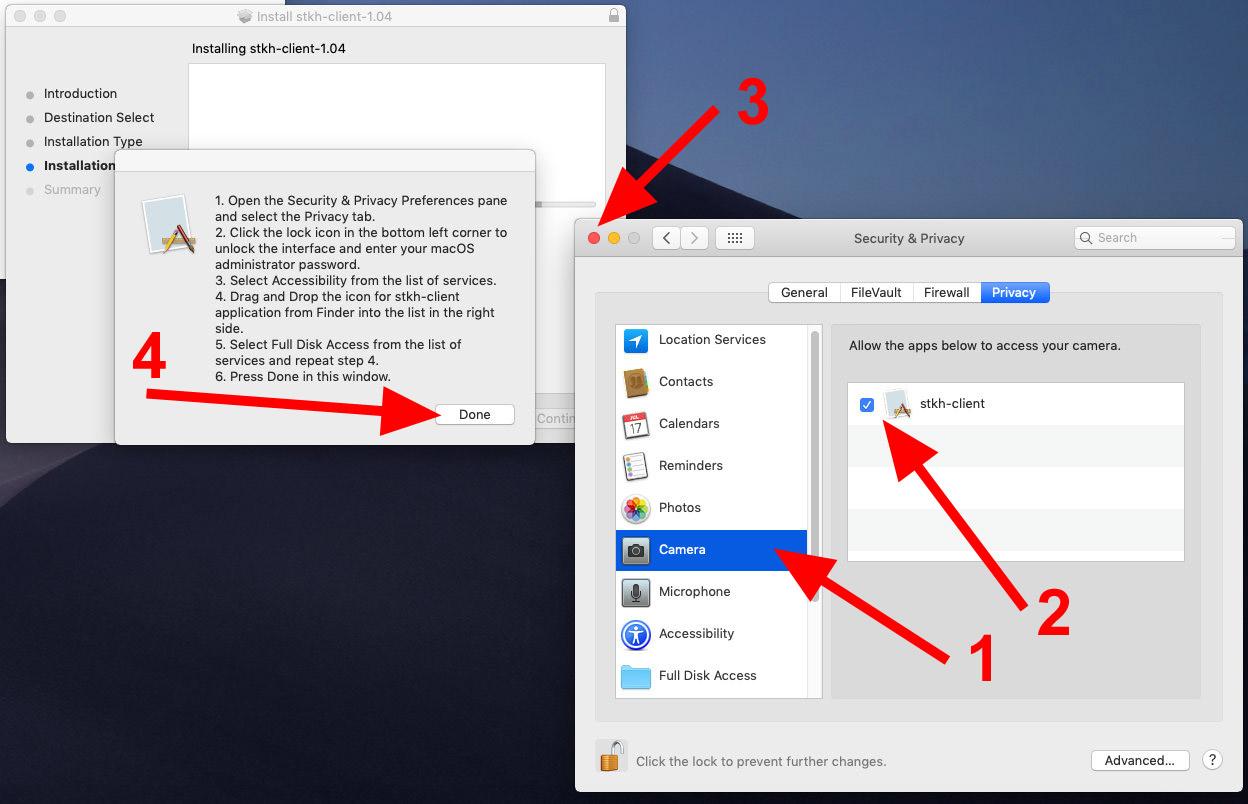
A pop-up window displays a brief instruction describing further actions.
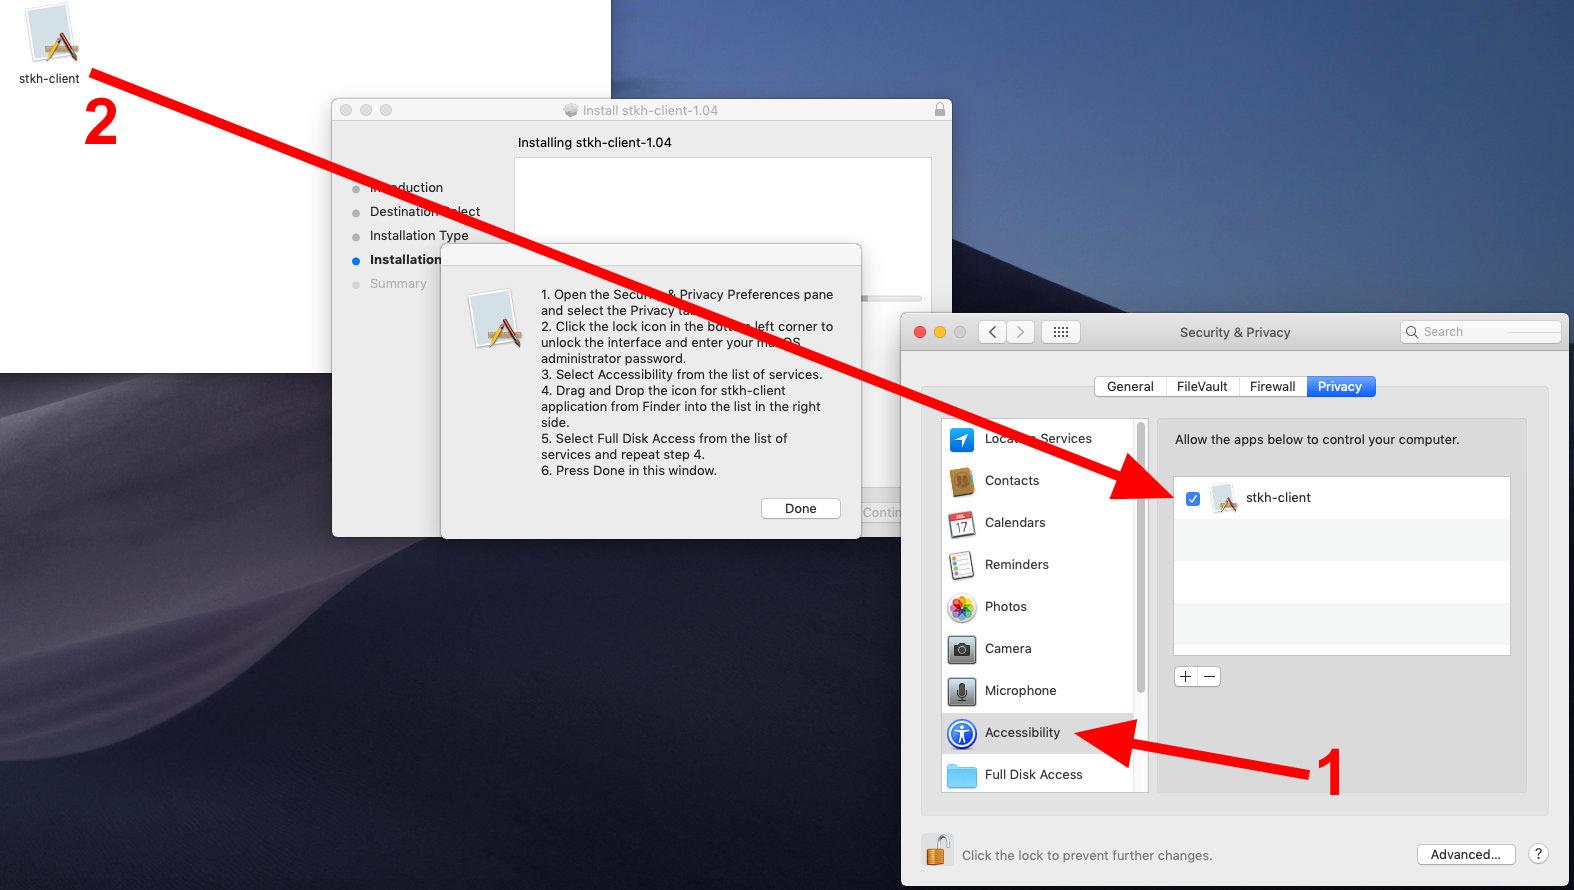
In the window that appears, select "Security & Privacy".
In the list at the left side select "Accessibility", then drag stkh-client file icon from Finder
into the list at the right side of the window.
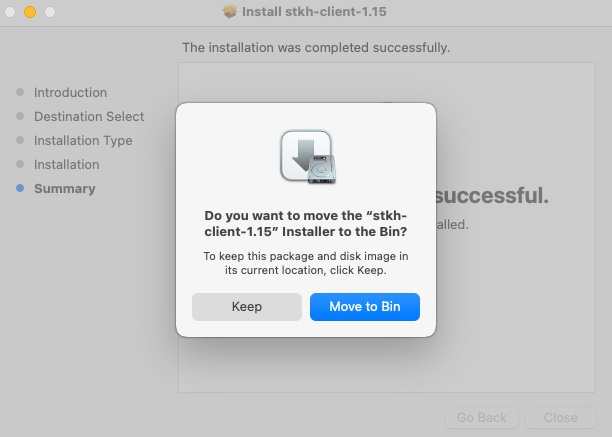
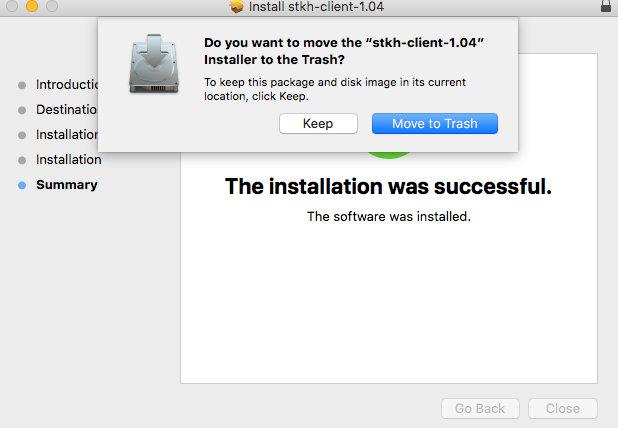
Setup is finished! Click "Close". Also you can click "Move to Trash" if package not needed more: |


|
Installation package should be downloaded here.
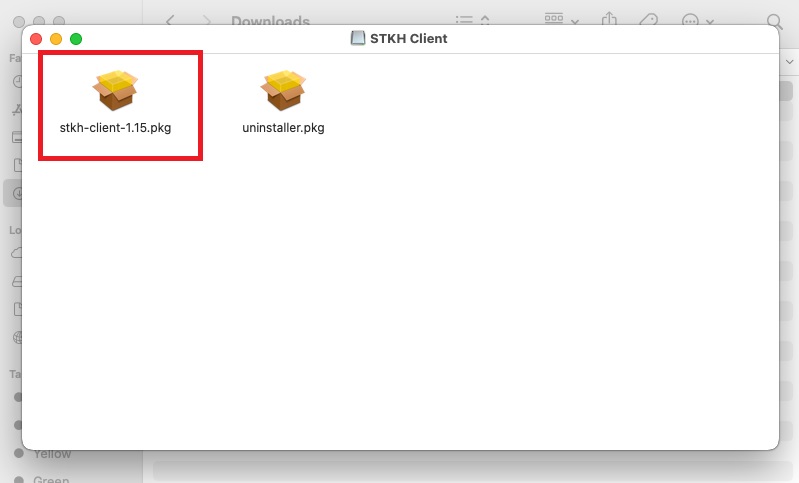
After downloading the application, open the folder with the downloaded application in Finder.
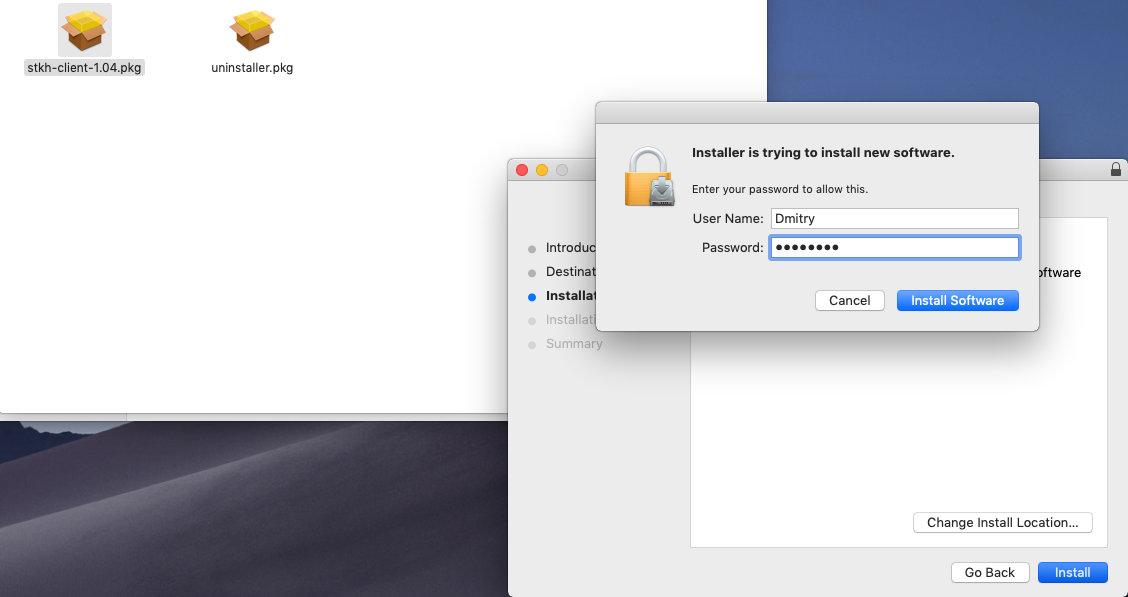
Administrator's password is need to know before installation!
During installation, a window appears for entering the server machine:
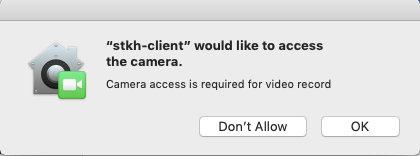
If web-camera is present, click "OK" to grant access to it:
Click "Open System Preferences".
Next, in the window that appears, go to the tab "Privacy" and click on the lock at the bottom of the window, then enter the administrator password:
Select "Accesibility" and drag stkh-client file icon into the window's right side, mark with check-box our application:
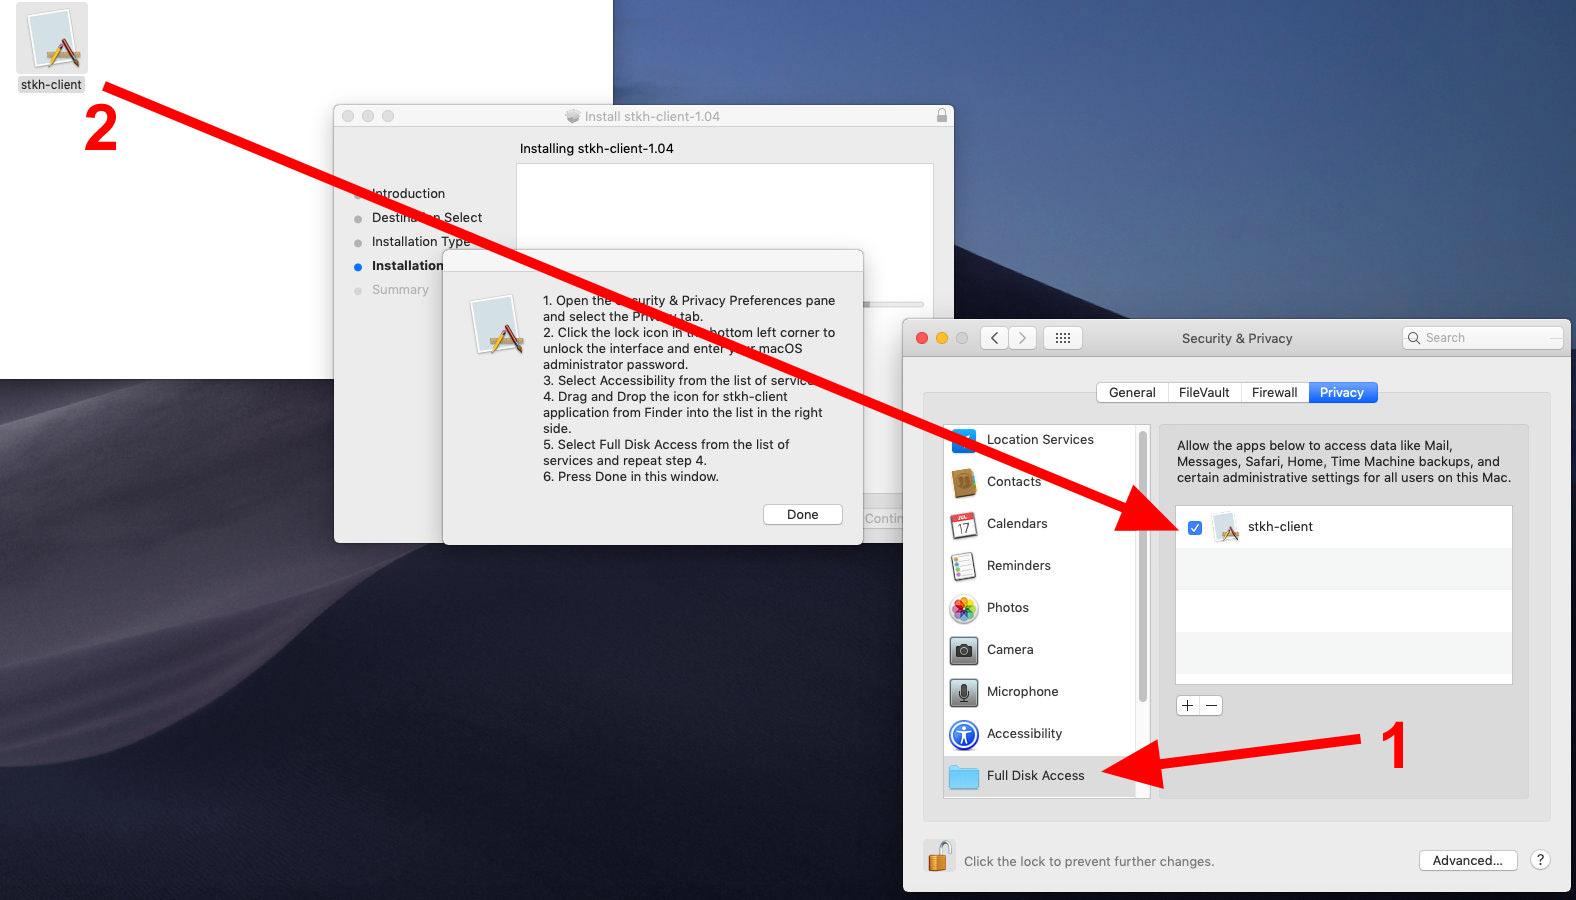
Next in the list at the left side select "Full Disk Access" and in the same way drag application's icon:
Only for Catalina: in the list at the left side select "Screen recording" and in the same way drag application's icon:
In the list at the left side select "Camera". Make sure that the client application is checked.
Setup is finished! Click "Close". Also you can click "Move to Trash" if package not needed more: |


|
Installation package should be downloaded here.
After downloading the application, open the folder with the downloaded application in Finder:
Administrator's password is need to know before installation!
During installation, a window appears for entering the server machine:
If web-camera is present, click "OK" to grant access to it:
The second pop-up window displays a brief instruction on further actions.
Click "Open System Settings":
Next, in the window that appears, go to the "Privacy and Security" tab and follow the steps:
Similarly, next:
Next, select "Full Disk Access" from the list and drag the application icon:
Close "Privacy and Security" window and click "Done" at the installer popup:
Setup is finished! Click "Close". Also you can click "Move to Bin" if package not needed more: |